Pages

Wednesday, October 16, 2024

Hugelkultur: Sustainable Gardening for Healthier Soil (Even in Pots!)

 If you’re a fan of sustainable gardening or just starting to explore ways to improve soil health naturally, you might have come across the term Hugelkultur. This centuries-old gardening technique, which originated in Germany and Eastern Europe, mimics natural forest ecosystems by using decaying wood to create nutrient-rich beds. Hugelkultur not only promotes healthier plants but also reduces the need for frequent watering and fertilization.

What’s more exciting? You don’t need a large garden space to try it out—you can even create Hugelkultur in pots! Let’s dive into what Hugelkultur is, how you can make your own Hugelkultur bed, and how to adapt it for container gardening.

What is Hugelkultur?

Hugelkultur, which means “mound culture” in German, is a method where you create raised garden beds using logs, branches, leaves, and other organic materials as a base. These materials break down slowly over time, enriching the soil and providing a continuous source of nutrients to plants. The rotting wood acts like a sponge, soaking up water and slowly releasing it back to the plants. It’s a natural way to build a healthy, fertile, and water-efficient garden.

Benefits of Hugelkultur

  • Soil Enrichment: As the wood decomposes, it enriches the soil with nutrients.
  • Water Retention: The wood holds moisture, reducing the need for frequent watering.
  • Improved Drainage: Hugelkultur beds are raised, allowing for better drainage.
  • Sustainability: It recycles natural materials, reducing waste and lowering the need for chemical fertilizers.
  • Soil Temperature Regulation: The decomposition process generates warmth, extending the growing season.


How to Build a Hugelkultur Bed

Creating a Hugelkultur bed in your garden is simple and highly customizable, depending on the materials you have on hand. Follow these easy steps:

1. Select Your Site

Choose a sunny location in your garden where you want to build your Hugelkultur bed. The size can vary, but larger beds will hold more water and nutrients over time.

2. Gather Organic Materials

Start by collecting the following materials:

  • Logs or large branches (avoid using chemically treated wood)
  • Smaller twigs and branches
  • Leaves, grass clippings, or straw
  • Compost or manure for additional nutrients
  • Soil to cover the bed

3. Create the Base

Lay down your largest logs or branches at the base of the bed. This will form the foundation. If the logs are too large, chop them into manageable sizes.

4. Add Layers

Add smaller branches, twigs, and leaves over the base logs. This layer helps fill in the gaps and will break down faster than the logs. For extra nutrients, you can add compost or manure.

5. Top with Soil

Once your base is in place, cover the entire bed with a thick layer of soil. Aim for at least 8-12 inches of soil to allow plants to establish roots.

6. Plant Your Garden

Now that your Hugelkultur bed is ready, you can plant vegetables, flowers, or any other crops you like. Over time, the organic materials underneath will decompose, enriching the soil and promoting healthy plant growth.

Hugelkultur in Pots: A Space-Saving Twist

Don’t have a backyard garden? No problem! You can still enjoy the benefits of Hugelkultur by adapting the method for container gardening. Here’s how to do it:

What You’ll Need:

  • A large pot (at least 12 inches deep)
  • Small twigs, sticks, or wood chips
  • Organic matter like leaves or straw
  • Potting soil
  • Compost

Steps for Hugelkultur in Pots:

  1. Choose Your Pot
    Make sure your pot has good drainage holes, as the wood will hold moisture, and you don’t want to over-saturate the roots.

  2. Add Twigs and Sticks
    Start by filling the bottom third of the pot with small twigs or wood chips. This acts as the wood base for your container Hugelkultur.

  3. Layer Organic Materials
    On top of the twigs, add a layer of leaves, straw, or other organic matter. This provides more material for decomposition and nutrient release.

  4. Add Compost
    Add a layer of compost to introduce beneficial microbes and extra nutrients.

  5. Top with Potting Soil
    Finally, fill the pot with high-quality potting soil, leaving a couple of inches at the top. This will be the growing medium for your plants.

  6. Plant
    Now, you can plant your favorite herbs, vegetables, or flowers in your Hugelkultur pot. Water well, and watch your plants thrive with minimal effort!

Conclusion

Hugelkultur is an excellent way to create a sustainable and water-efficient garden, whether in a large backyard or in a container on your balcony. By using natural materials like wood, leaves, and compost, you can mimic the processes of a forest floor to promote healthier plants and richer soil. Whether you have a garden or live in an apartment, Hugelkultur offers a simple, eco-friendly way to grow your plants while reducing waste and conserving water.

Wednesday, October 2, 2024

Legumes as Companion Plants for Potted Plants: A Natural Boost for Plant Health

If you're looking to improve the health and productivity of your potted plants, consider using legumes as companion plants. This simple yet effective gardening practice can significantly enhance soil quality, leading to healthier and more robust plants.

Why Legumes?

Legumes, such as beans, peas, and lentils, are natural nitrogen fixers. They have a symbiotic relationship with nitrogen-fixing bacteria in their root systems, which convert nitrogen from the air into a form that plants can use. This added nitrogen enriches the soil, providing essential nutrients that help plants grow stronger and healthier.

My Personal Experience with Lemon Plants

A few months ago, my lemon plant was struggling. It wasn’t flowering properly, and when it did, the flowers would drop off prematurely, resulting in little to no fruit. I decided to experiment by sowing legumes in the same pot, hoping they could improve the overall health of the plant.

To my delight, after just a few months of introducing legumes into the soil, my lemon plant's condition improved significantly. Over the last nine months, it has been flowering every three months, and I’ve been able to harvest wholesome, thriving lemons! The change has been remarkable, and I attribute this success to the nitrogen-rich soil created by the legumes.

How to Incorporate Legumes

  • Choose the Right Legumes: Beans, peas, and lentils are all excellent options. Choose varieties that will grow well in your climate and space.
  • Sow Them Directly: Plant the legumes directly into the same pot as your main plant. They will help condition the soil without competing for nutrients.
  • Care for Both Plants: Water and care for your legumes as you would your main plant. Once they finish their growth cycle, you can cut them back and leave their roots in the soil to further enrich it.

The Benefits

Sowing legumes in your pots offers several benefits:

  • Nitrogen Fixation: Improves soil fertility, providing essential nutrients for other plants.
  • Healthier Soil: Over time, legumes boost the overall health of the soil, making it more conducive to plant growth.
  • Improved Plant Health: Companion planting with legumes can help plants like lemons thrive by promoting better flowering and fruit production.

If you're having issues with flowering or plant health in your potted plants, consider introducing legumes. It’s a natural, cost-effective way to enrich the soil and boost your plants’ productivity. Happy gardening!

Wednesday, September 25, 2024

Air lift pump for hydroponics

 Air lift pump is an age old system used to pump water to a higher place. This system is a non effective system, but for hydroponics where we need to push water drop by drop and not in bulk, works best.


Monday, September 9, 2024

Planter to hydroponics

Converted this basic planter to a hydroponics system. The base plate is cut to hold the net pots. The drain holes have to be closed with m-seal. Plants grow happily in this SIP.
Deep water culture. Just had to add the water plus nutrients once in the whole lifetime of the plant (seed to harvest). As the roots grow the water goes down with it. This creates an air pocket which helps in air circulation.

Wednesday, August 28, 2024

Hydroponics in PVC pipe

Wanted to grow in PVC pipes. Got a 3inch diameter pipe. Cut holes, added end caps. For the water intake added a smaller hole (you can see that on the left). Added a C ring cut from the same PVC pipe to cover the hole so that it can slide for easy access and also save from algae growth in the nutrient. This pipe has 7 grow ports. Also holds a little more than 1.5 L of nutrient. Single set of nutrient runs for an average of 7 days.


Wednesday, August 7, 2024

Sustainable agriculture / Eco farming

The concept of sustainable agriculture has come because yields from modern farming technique (modern commercial agriculture) reaching a plateau and the environmental problems due to excessive use of chemicals and fertilizers and pesticides residue in food chain.

Sustainable agriculture is that form of farming which produces sufficient food to meet the needs of the present generation without eroding ecological assets and productivity of life supporting systems of future generations. Natural farming is an excellent illustration of sustainable agriculture. It is also known as ecological farming / ecofarming or organic farming or Permaculture. It is called eco-farming because ecological balance is given importance and organic farming because organic matter is the main source of nutrient management. It is a system of cultivation with use of manures, crop rotation and minimal tilling. Sustainable agriculture also involves agroforestry and multilevel cultivation and integrating animal husbandry.

Monday, July 22, 2024

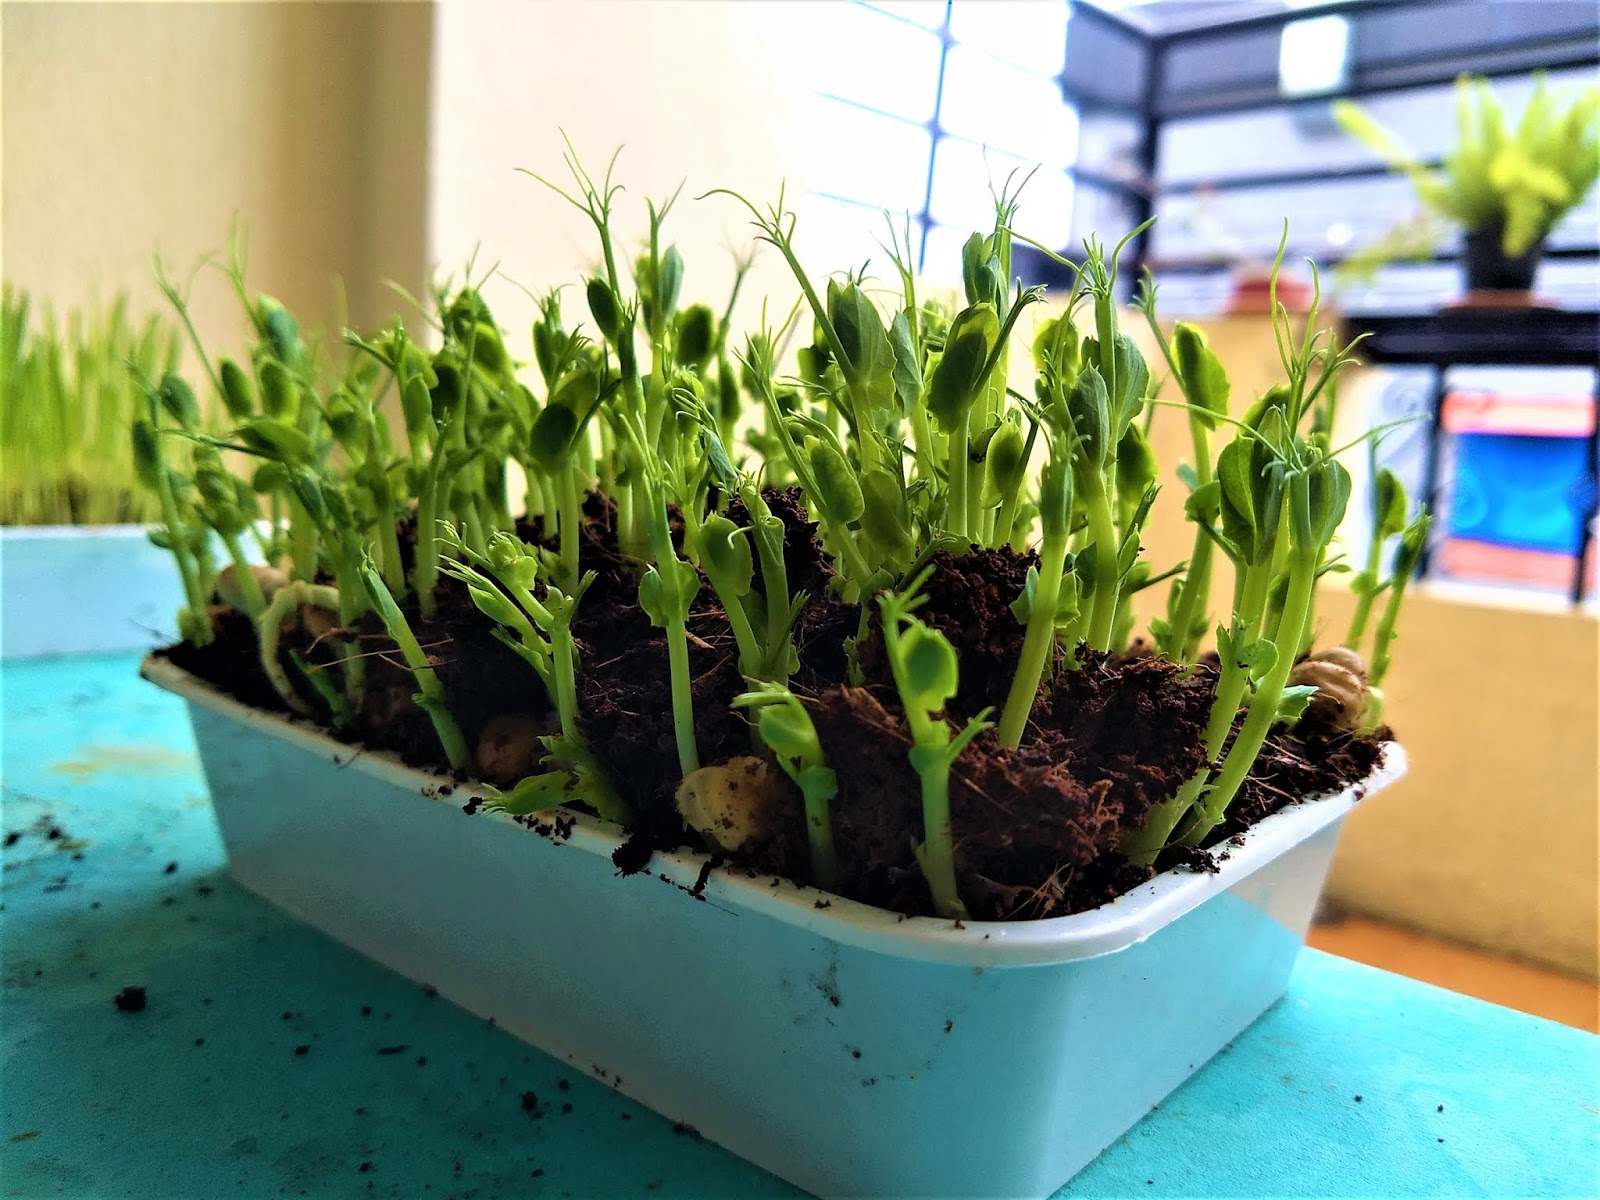
Grow yellow pea shoots

Use yellow pea shoots as an addition to salad. They are milder than the raw peas. They also don't have the lectins which is a natural toxin which is contained in the peas. You can eat the pea shoots for added protein and crunch to your food.

Monday, July 8, 2024

Grow your own wheatgrass for juice

Wheatgrass is:
  • High in Nutrients and Antioxidants
  • Reduces Cholesterol
  • Helps Killing Cancer Cells
  • Aid in Blood Sugar Regulation
  • Alleviate Inflammation
  • Help Promote Weight Loss
  • Easy to Add to Your Diet

Wheatgrass can be easily grown at home with handful of wheat from the grocery store. You get lush grass within 10 days and you just need small amount for your juice.


Tuesday, June 18, 2024

Pet bottle planters

Pet bottle planters are the best thing that can happen to one who is trying their hand on home hydroponics for growing plants st home. Here is a small step by step for how to make your own planter from old pet bottle which is thrown out.

Saturday, June 1, 2024

Mini Hydroponics system

A friend started a mini home hydroponics system last week. Started with an ice-cream container, cutting out holes for the 2 inch netpots. Simple box cutter worked like a charm.


Holding as much as 250ml of water. This much water is sufficient for a few set of mustard. He wanted to start with something. Proposed mustard from the kitchen spice rack. Every Indian house has mustard (even if it is a bachelor's condo). Mustard greens start within 2 to 3 days.


He is happy with his greens now. Wants to grow them to fully grown mustard plans. Roots have not come out of the baskets. Some of the tiny greens are dying out. May be due to the root congestion.

Tuesday, March 26, 2019

Hydroponics poster

I had a workshop and sale for home hydroponics system. This happened in Pune at Tilak Smarak Mandir. Conducted this under the Maker's Market initiative. Here is the poster for that.


Monday, March 25, 2019

Difference Between Tulsi and Basil

Main Difference – Tulsi vs Basil
Aromatic medicinal plants are primarily cultivated for the edible leaves, stems, barks, flowers or fruit components and they are essential flavoring and/or ayurvedic agents mainly used in South Asian countries. Tulsi and basil also belong to the aromatic medicinal group, and they share a similar taste profiles as well as features. As a result, tulsi is often referred to as basil or vice versa by the most of the consumers in the world. But tulsi and basil are two different plants; the botanical name of tulsi is Ocimum tenuiflorum whereas the botanical name of basil is Ocimum basilicum. Both tulsi and basil belong to the Lamiaceae family. The edible basil leaves are mainly used for culinary dishes whereas tulsi is mainly used as an indigenous medicinal ingredient. This is the main difference between tulsi and basil. Although, both tulsi and basil belong to the same family, tulsi and basil have different sensory properties as well as different applications and this article explores the difference between tulsi and basil.

What is Tulsi
Tulsi is an aromatic herbal plant, and its leaves are highly scented. It is native to the Indian subcontinent, and it is a blessed plant in Hindu belief.  Hindu people believe that it as an imaginable appearance of the goddess Tulsi, a wife of the god Vishnu. Therefore, Hindu people have tulsi plants growing in the center of the central courtyard. This plant is mainly cultivated for religious and Ayurvedic medicinal purposes, and for its essential oil extraction. It is believed strongly that tulsi has health beneficial effects against headaches, inflammation, common colds, malaria and heart disease. It is also important to prevent food poisoning.


What is Basil
Basil is a culinary herb mainly used as a flavoring agent in various  types of dishes in the world. Although it is originated in India, basil is mainly used in the Italian cuisine. People in Taiwan, Vietnam, Thailand and Cambodia also incorporate basil into their cooking. Leaves of basil have a pungent and strong taste.


Difference Between Tulsi and Basil
Tulsi and basil may have substantially different properties and applications. These differences may include,

Scientific Name
Tulsi is known scientifically as Ocimum tenuiflorum.

Basil is known scientifically as Ocimum basilicum.

Alternative Names
Tulsi is also known as Holy basil, Tulasi.

Basil is also known as Sweet Basil, Saint Joseph’s Wort, Thai basil, mints.
Basil grows beautifully in home hydroponics system. Basil heavily absorbs nutrient hence works best for home hydroponics with full concentration of nutrients.

Tuesday, March 5, 2019

Sowing calendar

We always seem to know when a vegetable is available in the market. And we think about why did not we know this 3 months earlier what to sow. Here is a sowing calendar for the whole year throughout India. Follow this and you are never to fail. This may not be a part of home hydroponics.


Tuesday, February 12, 2019

Liquid Seaweed Fertilizer

One of the best fertilizers you can use on your hydroponics plants is liquid seaweed. Yet this is probably the last fertilizer people think of buying when they go to their local garden center or shop online. Liquid seaweed fertilizer is not only organic, but comes from a sustainable source and can be harvested without damaging the environment.


Most seaweed-based fertilizers are made from kelp, a variety of seaweed that can grow to lengths of over 50 meters. Trace elements found in organic seaweed fertilizers include magnesium, potassium, zinc, iron and nitrogen—all of which are beneficial to plants not just for hydroponics. Nitrogen, for instance, is essential to the production of nitrate, a key component needed by plants during photosynthesis.

Impressive results have been found when applied to hydroponics and also that this is a natural product harvested in a way that won't have any negative impact on the environment or the sustainability of the seaweed itself. This makes the hydroponics system semi organic for those who think hydroponics is all chemical.

Where to use Liquid Seaweed Fertilizer?

Seaweed has more than 70 minerals, vitamins and enzymes. Some of the benefits are mentioned below:


  • Liquid seaweed solution promotes additional budding if applied as the plants are beginning to bud.
  • It extends the shelf life of fruits and vegetables if applied 10 days before harvesting.
  • The extract lengthens the life of cut flowers if they are sprayed with it a day or two before cutting.
  • It can also be used as a rooting solution. Place cuttings in a solution of liquid seaweed and water until roots develop, then plant. When planting seeds or transplanting, water with the solution.
  • If applied to pasture crops, the algae increases the nutrient uptake, the protein content and overall quality of the crop.
  • Seaweed extract also boosts crop yields, improves resistance of plants to frost and disease, increases uptake of inorganic constituents from the soil, bolsters resistance to stress conditions and reduces storage losses of fruit.
  • It promotes vigorous growth and helps deter pests and diseases on fruit, flowers, vegetables, lawns etc.
  • Seaweed fertilizers are especially useful in organic gardening. They contain almost every micro-nutrient in a fully chelated (immediately available) form. The algae is also full of carbohydrates, which plants use as a building block. Numerous beneficial microorganisms also use carbohydrates as a food source.
  • Liquid seaweed fertilizers (especially the alginates in the seaweed) act as soil conditioners. The alginates react with metals in the soil and form long, cross-linked polymers in the soil. These polymers improve the crumbling in the soil and swell up when they get wet. They also retain moisture for a long time.
Research on the Beneficial Effects of Liquid Seaweed

Numerous studies at major universities around the world have yielded various findings about the positive effects of liquid seaweed as a fertilizer, including:


  • Seeds soaked in seaweed extract germinate more rapidly, have larger root mass, stronger plant growth and higher survival rates. Soaking plant roots in the extract also reduces transplant shock and speeds root growth.
  • When plants were fertilized with seaweed researchers found that: geraniums produced more flowers per plant; grapes were sweeter; gladiolus corms grew larger; and cucumber yields increased 40 percent (and the fruits suffered less often from softening and rotting).
  • Improved yields after seaweed treatments were measured in potatoes, sweet corn, peppers, tomatoes, apples, strawberries, okra and oranges.
Liquid seaweed fertilizer can also be added in a home hydroponics system for replenishing the micro nutrients.


Tuesday, January 15, 2019

Disposable cup hydroponics planters

If you have ever attempted to start plants indoors, you probably know what it is to get a root bound plant. No matter the size of your growing container, it does not take the roots too long to find its outer boundaries. This method uses the benefits of home hydroponics growing to keep those roots thriving, while preparing your plant to live.


Take 2 disposable cups. Used ones are better. Don't worry! Nobody will judge you on what was in the cup prior to this project.


Make holes with a hot pin in one of the cups.
Put cocopeat in the cup with the holes and plant seeds or live plants in it.
Put water and nutrients in the other cup.
Stack the cups and you are done.
Your simplest hydroponic planter is ready.


Tuesday, January 1, 2019

Greenhouses in India


Why are the greenhouses in India failing to reach optimal produce? Most of the green houses we see while travelling are scrapped or abandoned. Green houses are the invention of the west that we are copying as it is. They use green houses because most of the time there the weather is cold and frosty. In India we have a weather that is totally opposite to these thing.
If you ask any grower in India who uses greenhouses, two things come up.

1. They want to grow lettuce

2. They want to use grow lights.

This is because this is what every one of them seen or heard about what is been done in the west. India needs spinach, mustard, fenugreek, chilies, lentils, tomatoes and other such things. These things don't need green houses as the weather in India is concerned.


We in India don't consume lettuce in bulk. We need to look towards the local produce which can be used to grow hydroponically, but surely will not require greenhouses.


As the lights are concerned, India has surplus light source considering the 8 hour of direct sunlight that can be used to grow the above mentioned staples.


If we considering cutting down on these to costly resources, there is no reason we can not grow hydroponically and get a profit out of it.


Considering growing lettuce in case, you do have an assured market for the supply of lettuce that comes out of your farm, through B2B rate contracts or otherwise, please go ahead and set-up a lettuce factory. But if you are doing it just based on assumption that you will find the market later, better go small and test the hypothesis first.

Monday, December 3, 2018

Growing mediums

There are various preferred growing mediums for the hydroponics gardener. Hydroponics in latin itself means water work. That means we remove the use of soil as a growing medium. The nutrients are applied directly to the roots through application in water.

Various growing mediums have their advantages and disadvantages.
Clay balls: They have good retention of water and due to the porosity they also retain good aeration. They have to disinfected the first time and between subsequent uses.

Perlite: Their operation is same as the clay balls, but due to their small size they tend to clog the automated systems.

Coco Peat: Cocopeat are the cheapest option of all. They are acid neutral. They have to be processed before using as they tend to contain high amount of salts.

Rock wool: They are the costliest growing medium. They were used as insulating in refrigerators previously. They tend to be alkaline, processing in acidic water is required before application.

Sand: Sand is the easiest available and the cheapest growing medium. They need continuous supply of water as they have low water retention capability. Aeration is never a problem with sand.

Common features of growing mediums.

  • They are not needed to throw away the old medium (as is sometimes needed with soil), so the long-term expense is reduced.
  • It is lightweight, so no hassle in removing large pots.
  • Its numerous tiny air pockets provide a good source of oxygen and help hold moisture.

Thursday, November 29, 2018

Newspaper pots as seed starter

How to use old newspaper pots for seed starting.


When stating seeds like tomatoes. People look for something to sow them. That way when the seedlings are larger they pull them out and sow them in proper deep pots. But when it comes to starting the seeds, people remember that they did not collect sufficient curd containers to fulfill their needs. Now here is a project that can help you in these places. Just by using old newspapers you can make as many seed starters as you like.
For that you will need find a small glass to use for the project, this will depend on what size seedlings you’re transplanting, but generally a small juice glass will be sufficient. Get a glass of straight sides, rather than one that is tapered.


Step 1: Cut it. Start by cutting a fully unfolded newspaper sheet into four equal strips, lengthwise.
Step 2: Roll it. Layer the strips, one on top of the other, creating a single strip of newspaper that’s four layers thick. Wrap the newspaper around the open end of the juice glass, leaving enough slack in the paper so that you can slide it off the glass in step 3
Step 3: Tuck it. Stuff the end of the newspaper into the opening of the juice glass, then slide the glass out of the newly formed tube. If you haven’t noticed the taper in your glass, this is the point at which it will become frustratingly apparent.Step 4: Tamp it. Flip the juice glass around, insert the bottom of it into the tube, and tamp down to secure the base of the pot.
Step 5: Fill it. Remove the glass and fill the tube with potting mix.Step 6: That’s it! Now you’re ready to transplant. The pots will hold together until you’re ready to plant your seedlings in the garden, though you’ll want to avoid moving them around too much in the interim. The newspaper can be composted when you’re finished with it.

Wednesday, November 28, 2018

How to Grow food in Cans


Here’s a little garden idea, an idea for a small garden, an idea for someone who knows little about gardening.
You have various cans lying around the house. Simple!
  1. Take a food can.
  2. Punch holes at the bottom.
  3. Fill with mix of soil manure and coco-peat.
  4. Water it thoroughly.
  5. Put some seeds available on your kitchen counter. (Coriander, fenugreek, cucumber, bittergourd or anything else)
  6. Place the can in sunlight or near the window.
  7. Water regularly.

Who says canned food is bad for you?

History of hydroponics 2


1860 & 1861 marked the end of a long search for the nutrient source essential for plants' growing when two German botanists, Julius von Sachs and Wilhelm Knop delivered the first standard formula for the nutrient solutions dissolved in water, in which plants could be grown. This is the origin of "nutriculture". Today, it is called the water culture. By this method, plants' roots were totally immersed in a water solution that contained minerals of nitrogen (N), phosphorus (P), potassium (K), magnesium (Mg), sulfur (S) and calcium (Ca). They are now seen as the macro elements or macronutrients (elements required in relatively large amounts).


However, surprisingly enough, the method of plants growing in water and nutrient solution was only seen as experiments and merely used in the laboratory for plant research. 
Only when the greenhouse industry appeared that interest in the application of the nutriculture practice was eyed on in 1925. Researchers were caring about the issues of soil cultural methods with soil structure, fertility, and pests. They worked extensively to implement the benefit of nutriculture to large-scale crop production. 
In the early 1930s, W.F. Gericke of the University of California at Berkeley experimented with nutriculture to produce agricultural crops. Initially, he called this process aquaculture but dropped it after learning that this term has been used to describe aquatic organism culturing.
W.A. Setchell recommended the term "hydroponics" to Gericke in 1937. So the name goes.
The word was derived from two Greek words. Hydro (“water”) and Ponos (“labor”)— literally “water working.”
Gericke began publicizing the practice of growing plants in a water solution while he was at the U.C. Berkley.
However, he met up with the skepticism from the public and the university. His colleagues even denied the use of the on-ground greenhouses for his study.
Gericke declared them wrong by successfully growing 25-foot tall tomato plants in nutrient-filled solutions. 
The university still doubted his account of successful cultivation and requested two other students investigate his claim. The two performed the research and reported their findings in an agriculture bulletin 1938, titled "The Water Culture Method for Growing Plants Without Soil"
They confirmed the application of Hydroponics but concluded their research that crops grown with Hydroponics are no better than those grown on quality soils. However, they missed many advantages of agricultural Hydroponics in comparison with the cultural practice. The benefits that nowadays any hydroponic growers know by heart. 
The earliest well-known application of Hydroponic plant cultivation was in the early 1940s when Hydroponic was used on the Wake Island, a soil-less island in the Pacific Ocean. This island was used as a refueling stop for Pan American Airlines. The lack of soil meant that it's impossible to grow with the cultural method and it was incredibly expensive to airlift fresh vegetables. Hydroponics solved the issues excitingly well and provided fresh vegetable for the whole troops on this distant island. 
After World War II, Hydroponic cultivation was still used widely by the military. The U.S. army planted a 22 ha at Chofu, Japan.
In the 1950s, the soil-less method of Hydroponics expanded to a variety of countries including England, France, Italy, Spain, Sweden, the USSR, and Israel.